Normalizing & Unnormalizing Depth
Let’s talk about Depth data. There are a few different kinds, but in the broadest sense you will most likely run into Normalize and Unnormalized depth data
Normalized
+ Values are mapped between 0-1
+ Easy to view, and work with
- Not accurate to the scenes depth
- Not compatible with most rendered Depth from 3D apps
Unnormalized
+ Values represent the true distance from the camera to the object
- Harder to view, and work with
+ Accurate to the scenes depth
+ Compatible with most rendered Depth from 3D apps
Converting to Normalized or Unnormalized
Here’s how you can convert Depth data from normalized, to unnormalized, or vice versa!
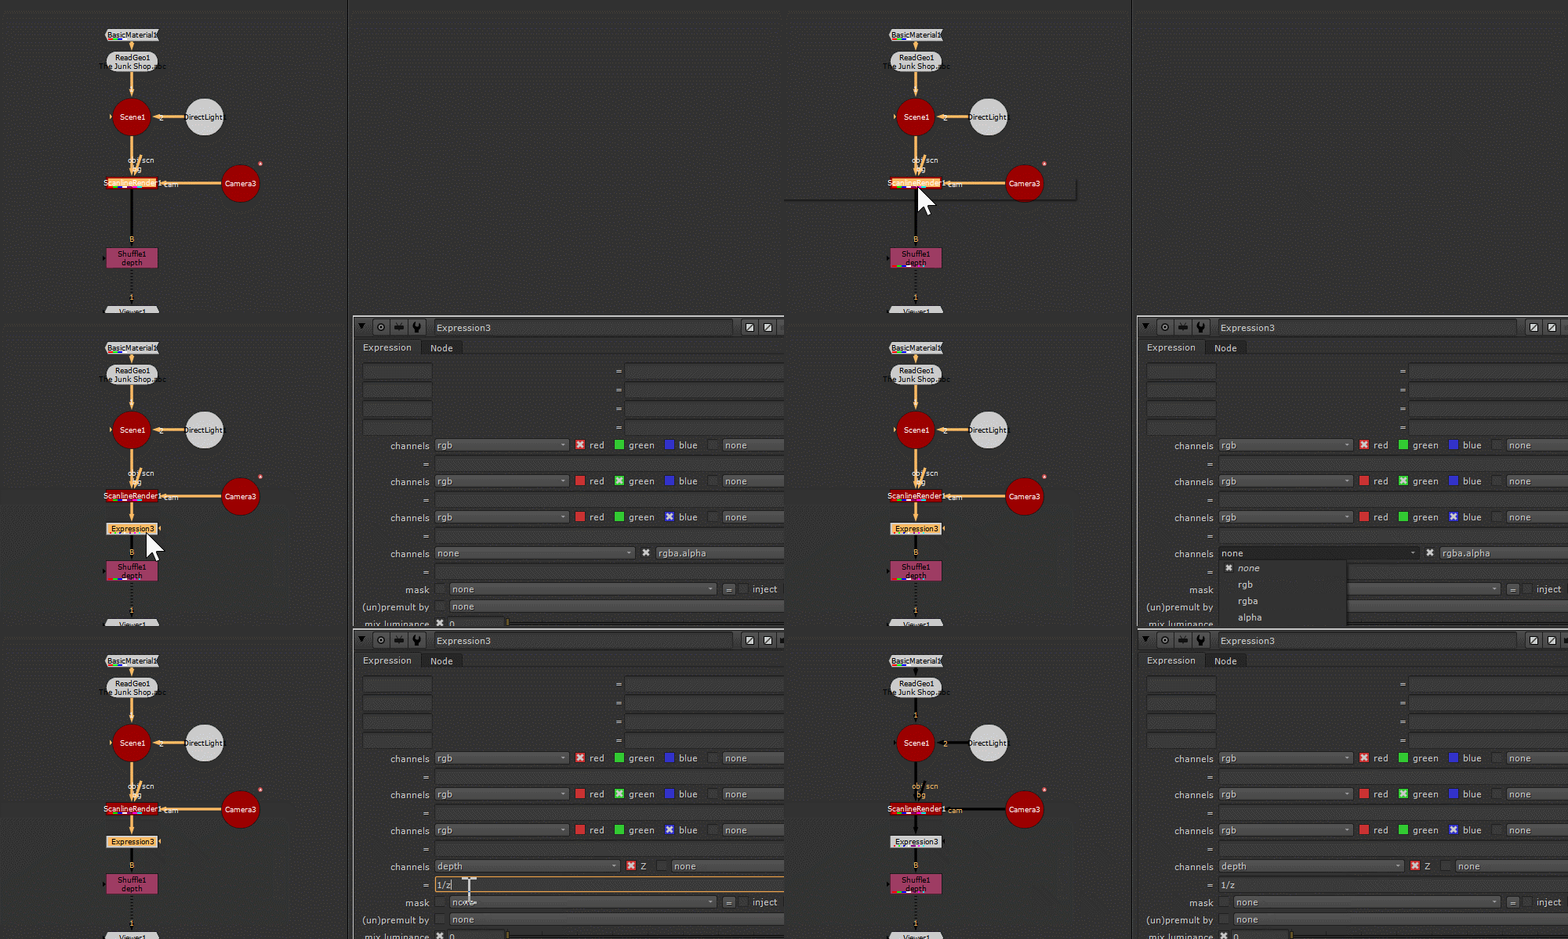
Create an expression node below your ScanlineRender, or whatever pipe contains your depth channel
In the channels knob, change the channel to depth z
In the expression field directly below the channel knob put this expression 1/z
How does it work?
The 1/z expression takes large values like 1000, and converts them into small values like 0.001. You can try this yourself in a calculator 1/1000 = 0.001. This means that any positive number greater than 1 will be converted into a positive decimal, and since 1/1 is equal to 1, you end up with everything between infinity-1 remapped between 0-1, aka normalized. Conveniently this also works to unnormalize data because 1/0.001 = 1000
There is one issue with this method, if you have scene with large unit scale, or a camera really close to a ground plane, you can sometimes end up with a bad depth normalization, where the data increases above 1 towards camera. An easy fix to this is to modify the expression to 1/(1 + z) in order to force the depth data to all be above 1, before dividing it against 1. Generally we can expect the visible depth data to start at a value greater than 1, and ignore this however, and using this expression does slightly alter the data so it is no longer true to the scene
Why would you want Unnormalized Depth?
This is a common issue when working with Nukes ScanlineRender, as it outputs normalized depth information, and most compositors work with renders from apps that don’t. So when you want to merge ScanlineRender depth with your 3D render depth, it first needs to be converted. It’s also useful for developing tools that use the distance from the camera, to the sampled pixel, like you can see in the zDefocus focal point knob
Why would you want Normalized Depth?
For a great deal of comp operations it isn’t necessary to have true depth information, doing a depth based color grade for example can work with either data types. Even DOF can be done with normalized data, and it is easier to see in nukes viewer
Why I prefer Unnormalized Depth
In my experience being able to see depth data easily isn’t worth the trade off, because when you are working with depth data, the true distance is a valuable piece of info. When you are adding atmospheric perspective for example, knowing the true distance between objects can help you dial in a realistic result. As a supervisor I have used this info to find out if Layout/Anim have cheated perspective, and finally as a tool developer, it makes things a bit more straightforward to work with
How to identify Normalized & Unnormalized Depth
In nuke you can shuffle out the depth channel into rgb, and sample it by holding Ctrl while looking at it with your viewer. In the bottom of the viewer window you will see the rgba values. If these are below 1 and above 0, the depth pass is normalized, if they are above 1 they are unnormalized. As a result of these values, when looking at Unnormalized data you likely won’t see any details, unless you gain down your viewer significantly, but as you can see in the image below, the unnormalized depth tells me the boat is 80 units from camera


